A little setup. A lot less retyping.
TypeCorrect: How to make it work?
From download to your first double‑Shift. Here’s everything you need to make TypeCorrect feel at home on your Mac.
Step 01
Download the DMG
Start with the latest TypeCorrect download. You’ll find the .dmg file in your browser’s downloads or your Mac’s Downloads folder.
You’ll need macOS 13 or later. TypeCorrect works on Apple silicon and Intel Macs.
Download for MacStep 02
Install the app
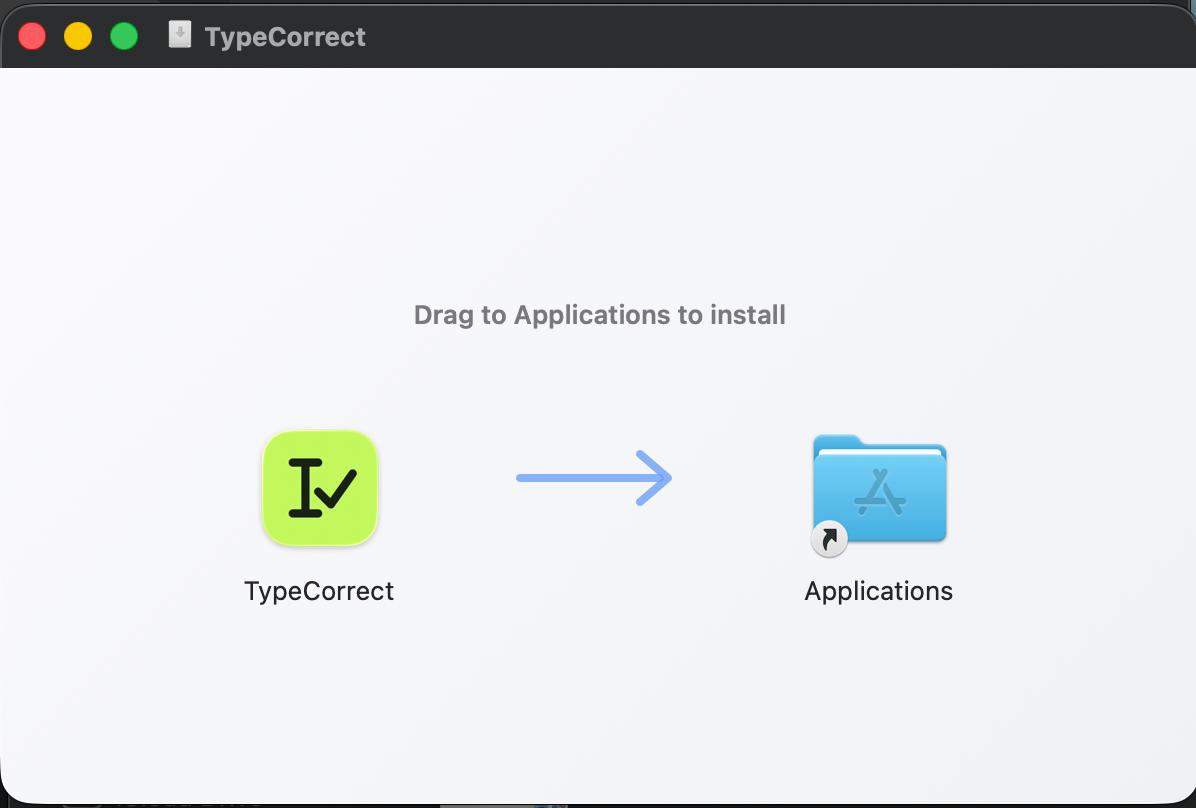
Open the .dmg file, then drag TypeCorrect into Applications. Wait for the app to finish copying before the next step.
You can eject the disk image after installing. TypeCorrect lives in your menu bar, so you won’t normally see a Dock icon.
Step 03
Open TypeCorrect
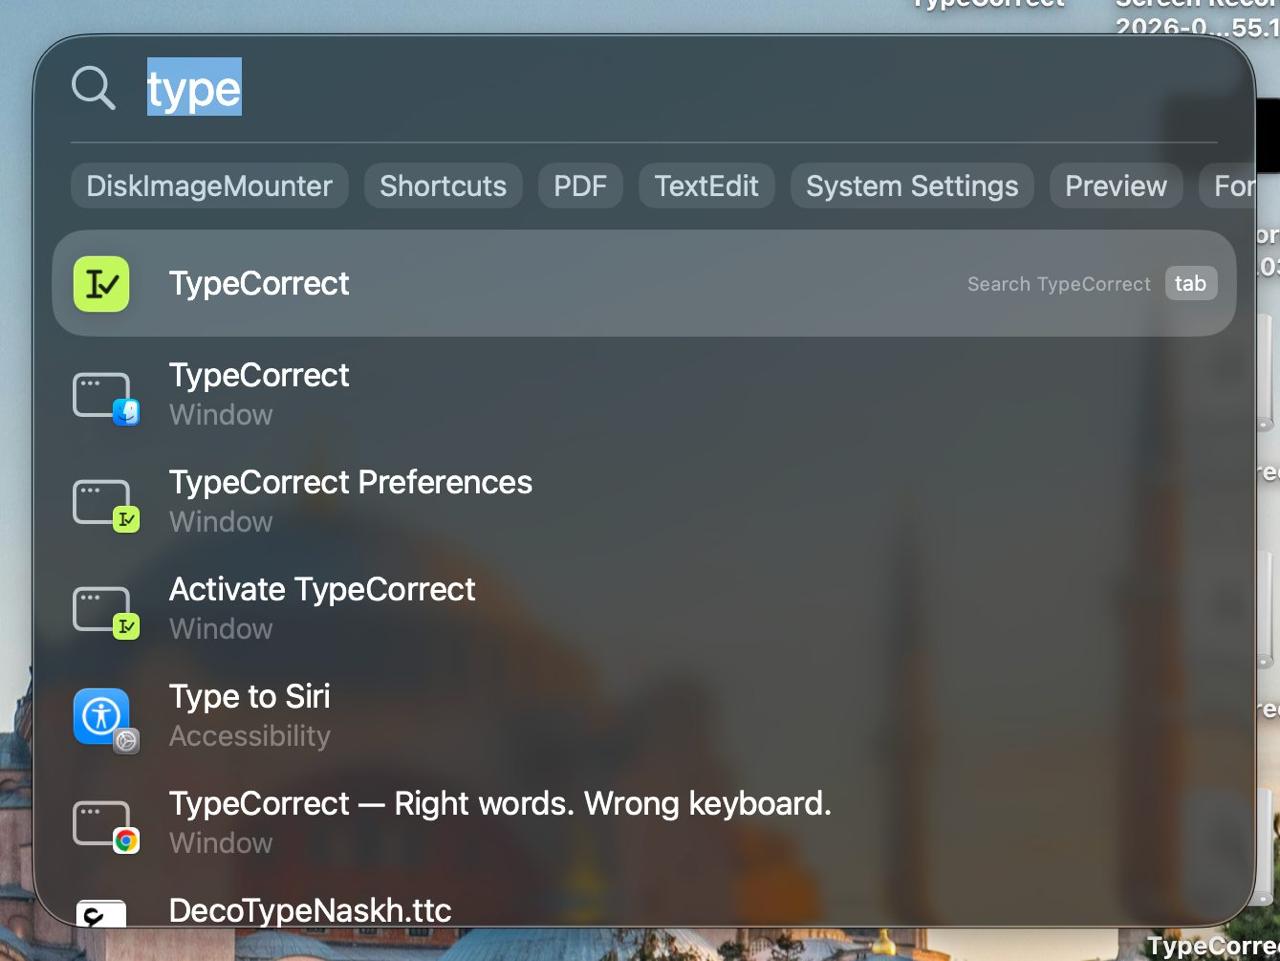
Press ⌘ Space (Command + Space) to open Spotlight. Type TypeCorrect, select the TypeCorrect app, and press Return to open it.
Look for the green TypeCorrect app icon. If Spotlight doesn’t find it yet, open TypeCorrect from your Applications folder instead.
Step 04
Buy a license
Your first 30 switches are free. When you’re ready, click Buy a license and complete checkout through Polar. Your license key is available after checkout and is also sent to the email address you used.
Already bought it? You can skip this step. Check your spam folder if the email hasn’t arrived.
Buy a license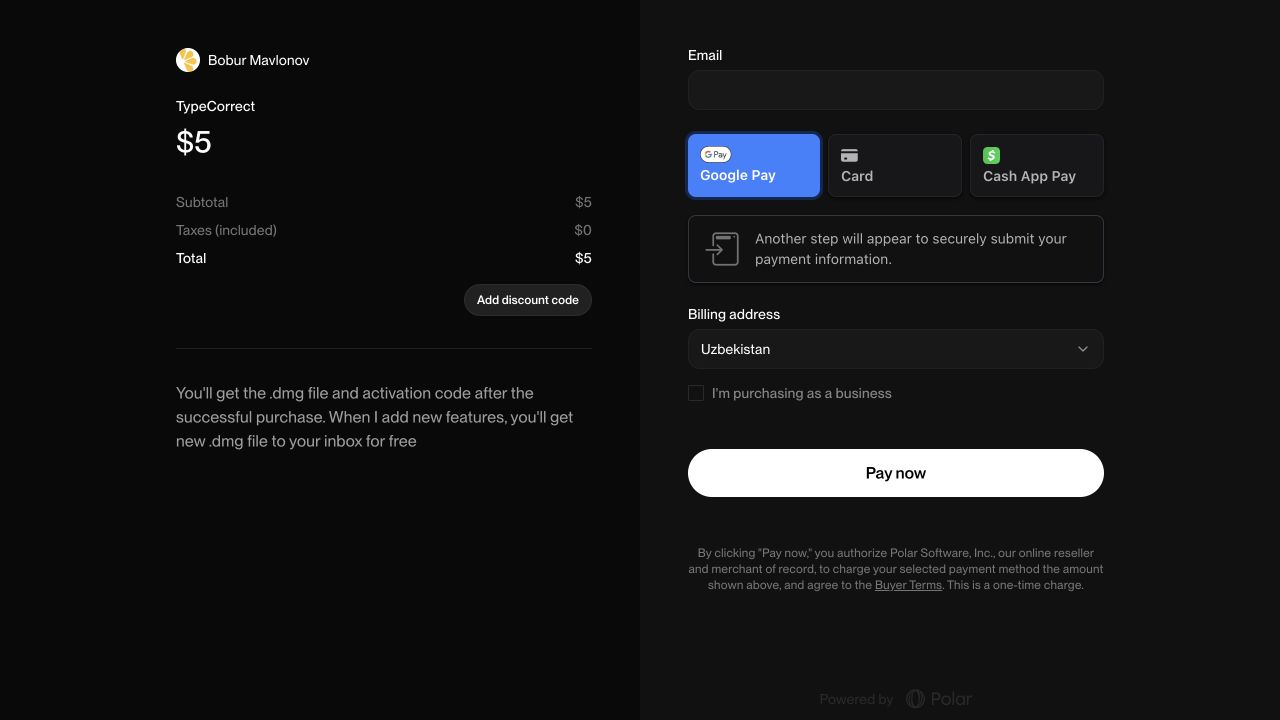
Step 05
Enter your license key
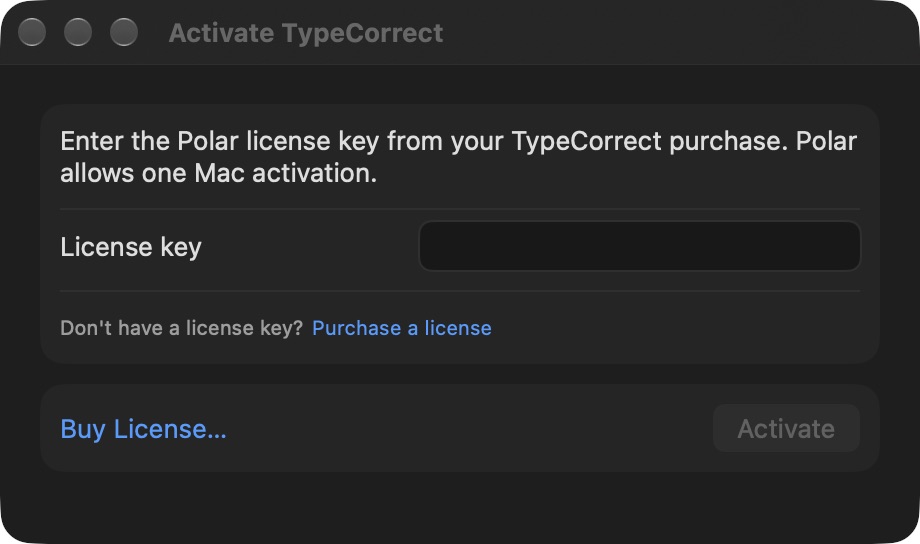
Open TypeCorrect and paste your license key into the activation window. Use ⌘V, or the Paste button if your version shows it, then click Activate.
Keep your Mac online for activation. Copy the key itself, without any surrounding email text. The license activates one Mac.
Step 06
Give needed permissions
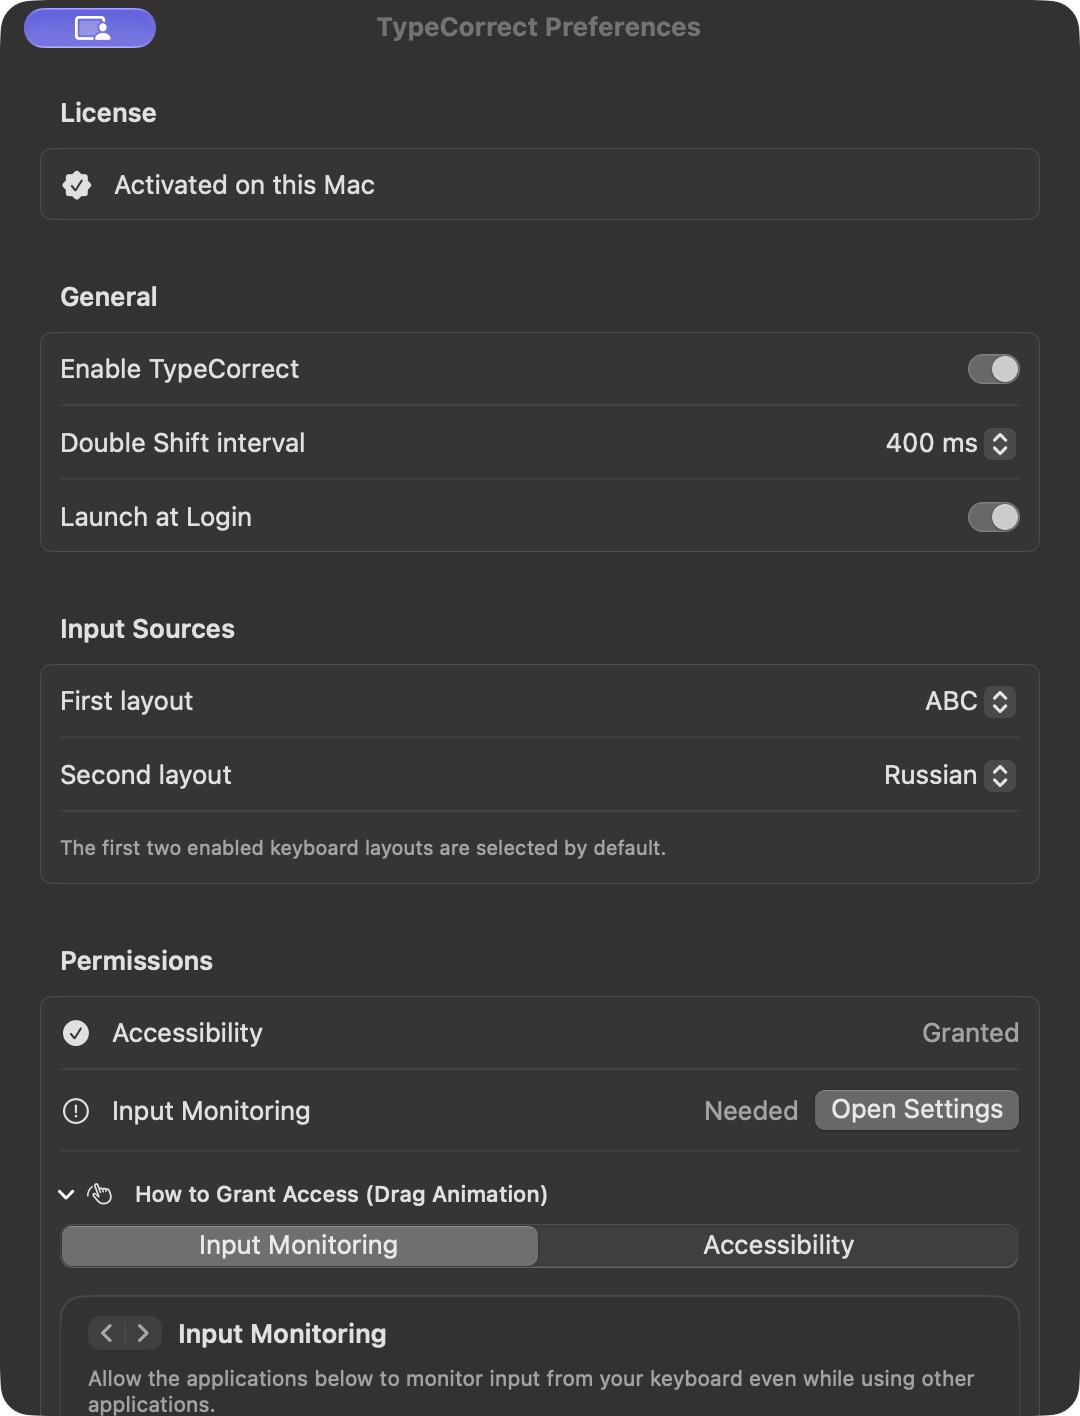
Open TypeCorrect Preferences from the menu bar. In System Settings → Privacy & Security, enable TypeCorrect under both Accessibility and Input Monitoring.
Accessibility lets the app read and replace the text you want to fix. Input Monitoring lets it detect double‑Shift. If the app isn’t listed, add TypeCorrect from Applications. Return to Preferences to check the status; quit and reopen it if macOS asks.
Step 07
Turn on “Launch at login”
Open TypeCorrect Preferences from the menu bar. Under General, turn on Launch at Login so TypeCorrect starts automatically when you log in to your Mac.
You’re all set! Choose your two keyboard layouts and keep TypeCorrect enabled. Double‑tap Shift to fix the word at the caret, or select a phrase first to fix only that text.
Try the demo
Screenshots show the English interface. Labels may vary slightly with your macOS or app version.
Need a hand?
Can’t find your key, or something isn’t quite right? Email us and we’ll help you get going.
All set. Keep your train of thought.
The next time your keyboard gets ahead of you, two taps bring your words back.